UDN
Search public documentation:
AnimTrails
日本語訳
中国翻译
한국어
Interested in the Unreal Engine?
Visit the Unreal Technology site.
Looking for jobs and company info?
Check out the Epic games site.
Questions about support via UDN?
Contact the UDN Staff
中国翻译
한국어
Interested in the Unreal Engine?
Visit the Unreal Technology site.
Looking for jobs and company info?
Check out the Epic games site.
Questions about support via UDN?
Contact the UDN Staff
UE3 Home > Particle & Effects > Particles Systems > Particles AnimTrails Tutorial
UE3 Home > FX Artist > Particles AnimTrails Tutorial
UE3 Home > FX Artist > Particles AnimTrails Tutorial
Particles AnimTrails Tutorial
Overview
Sample AnimTrail Emitters
Creating an AnimTrail Particle Emitter
Create a new ParticleSystem
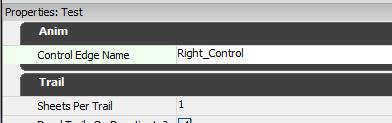
Start the editor, right-click in the Content Browser, and select "New ParticleSystem". The New window will pop-up, prompting you for a package name, object name, and the factory. After naming the new Particle System, Cascade will open. Add a new AnimTrail Data node to the emitter.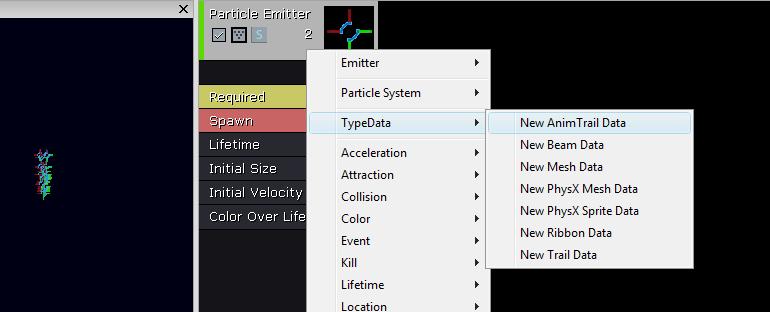 In the 'Control Edge Name' field type 'Right_Control'. This is the name for the socket we will be adding to our skeletal mesh later on.
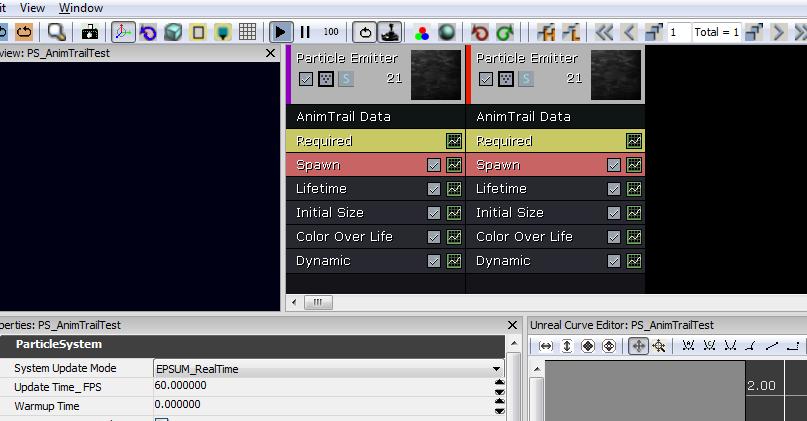
 On the 'Required' node, assign a material to be used for the particle. (We used a translucent unlit material that pans to the right with some noise)
Since we want an AnimTrial on each arm, duplicate the emitter and rename the 'Control Edge Name' of the new emitter to 'Left_Control'.
On the 'Required' node, assign a material to be used for the particle. (We used a translucent unlit material that pans to the right with some noise)
Since we want an AnimTrial on each arm, duplicate the emitter and rename the 'Control Edge Name' of the new emitter to 'Left_Control'.
Setting up Sockets
Setup animation sockets on the arms of the skeletal mesh. There needs to be three sockets for each trail. One for the first edge, one for the second edge, and one for the control point. The first and second edge sockets define the two edges of the trail that is rendered. The control point is used to determine the texture coordinate value along the trail. For reference on how to add sockets see SkeletalMeshSockets. In this example we will be using the WeaponPoint sockets for the first edge. We then created sockets for the second edge and control point for each arm. The end result is below.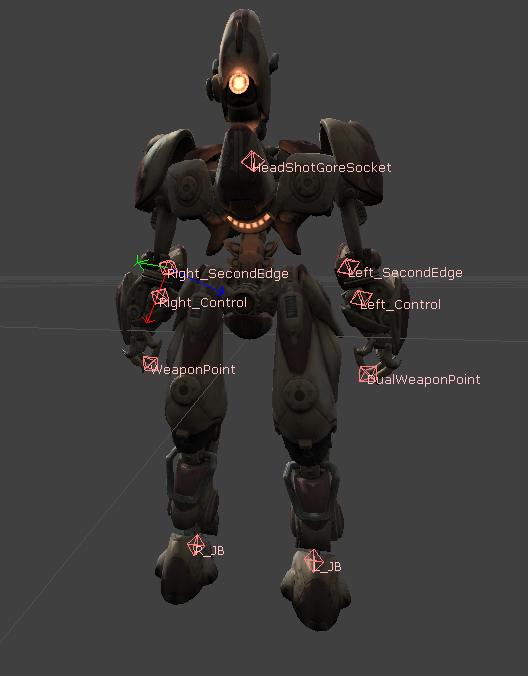
Adding AnimNotifies
We will need two AnimNotifies. One for each arm. These are added on the AnimSequence tab of the AnimSet editor. Add a new Notify, then click on the blue arrow and add a AnimNotify_Trails.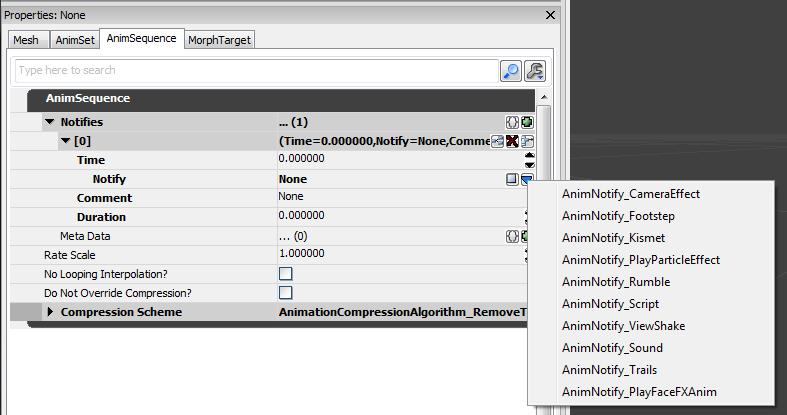 You will need to have an AnimNotify for each arm. Set the start time and duration for each notify as it fits with the AnimSequence. For this example, we are using a jump up and slam the ground animation. We want the AnimTrails to start at the top of the jump and stop when the character lands.
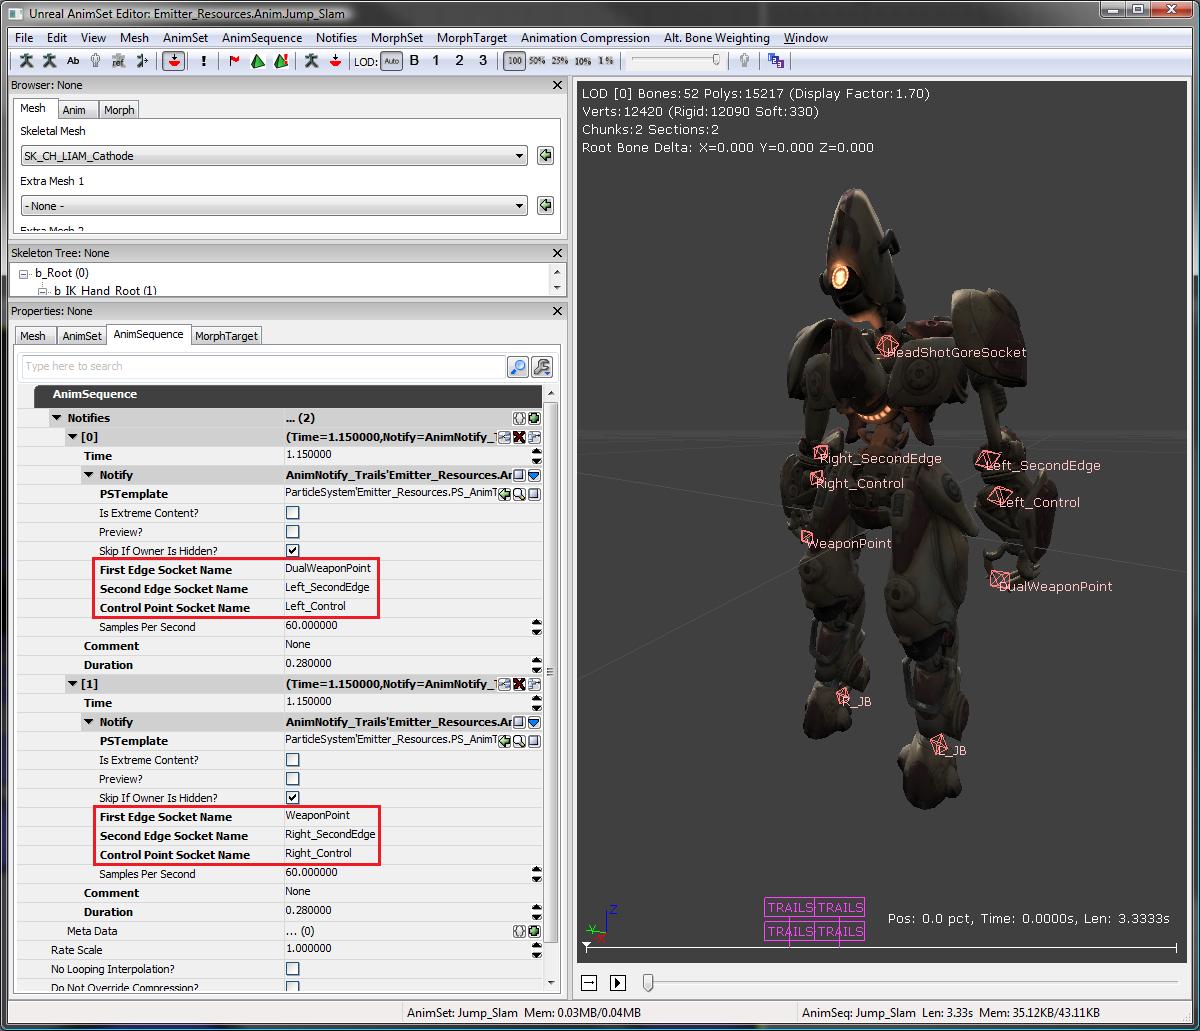
Next, fill in the names for the sockets you have created. It should look like this:
You will need to have an AnimNotify for each arm. Set the start time and duration for each notify as it fits with the AnimSequence. For this example, we are using a jump up and slam the ground animation. We want the AnimTrails to start at the top of the jump and stop when the character lands.
Next, fill in the names for the sockets you have created. It should look like this:
 To view the trails, turn on PSys Previews by selecting 'Enable all PSys Previews' from the 'Notifies' menu in the AnimSet editor and play the AnimSequence.
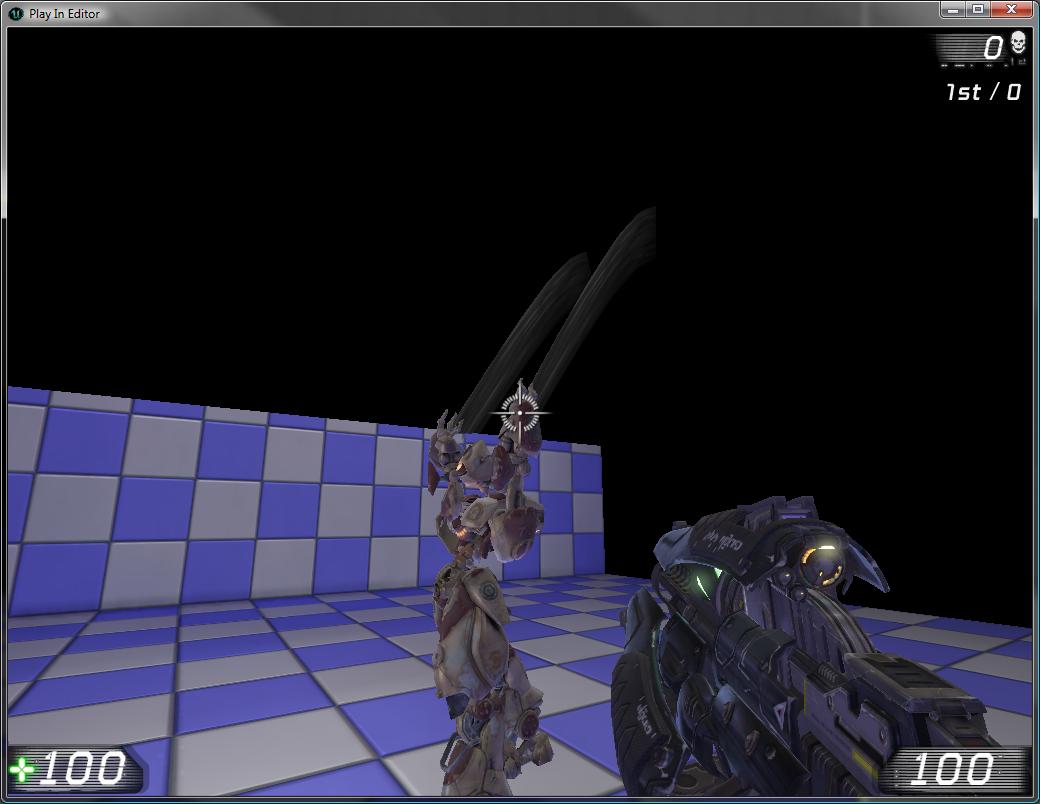
Alternatively, place your skeletal mesh in a level and set up the character to play the AnimNodeSequence. Run PIE to view the effect.
To view the trails, turn on PSys Previews by selecting 'Enable all PSys Previews' from the 'Notifies' menu in the AnimSet editor and play the AnimSequence.
Alternatively, place your skeletal mesh in a level and set up the character to play the AnimNodeSequence. Run PIE to view the effect.