UDN
Search public documentation:
UsingSoundActors
日本語訳
中国翻译
한국어
Interested in the Unreal Engine?
Visit the Unreal Technology site.
Looking for jobs and company info?
Check out the Epic games site.
Questions about support via UDN?
Contact the UDN Staff
中国翻译
한국어
Interested in the Unreal Engine?
Visit the Unreal Technology site.
Looking for jobs and company info?
Check out the Epic games site.
Questions about support via UDN?
Contact the UDN Staff
Sound Actors
Overview
AmbientSound Actor
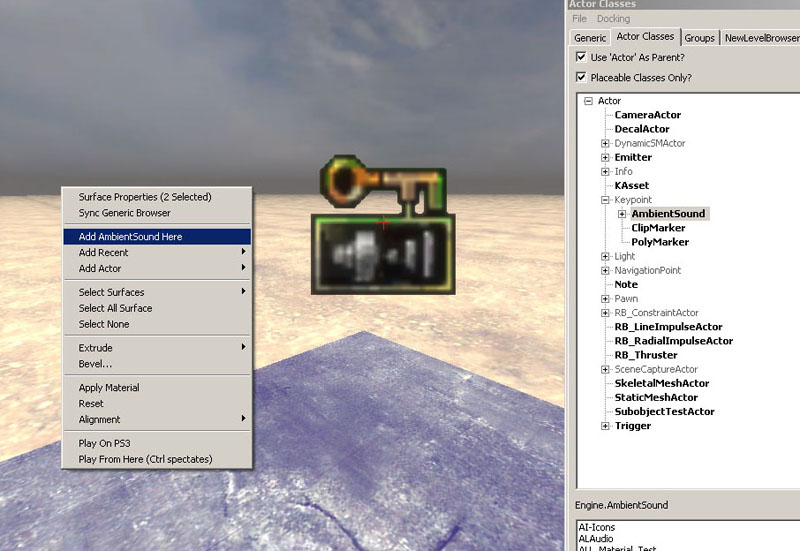 This Actor is largely used for triggering ambient looping sounds but it can also trigger non-looping sounds. When listener enters the radii defined in the SoundCue Editor the Actor is trigger once. If the Looping Node is utilized, it'll play repeatedly within the radii and respond to all properties defined in the SoundCue. If the Looping Node is not utilized the audio file will trigger once when listener enters radii.
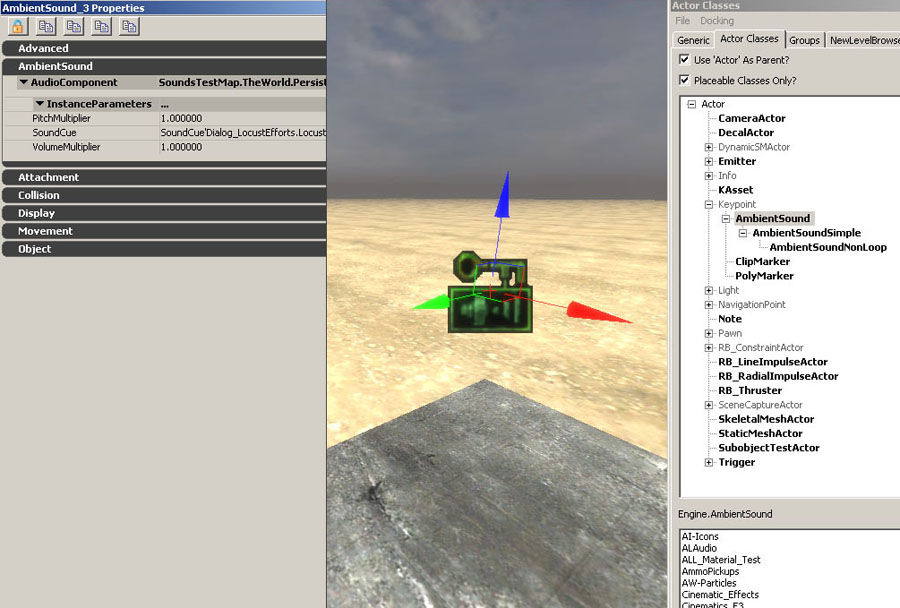 The only controllable parameters on this actor are Pitch and Volume. The Radii must be defined in the SoundCue and there isn't a graphic representation of it in the editor. Use this actor when the flexibility of the SoundCue Editor to create complex sounds is more desirable than radii control\visibility. If you want to trigger the same Cue in multiple locations with different radii settings you'll need to create duplicate Cues for each instance.
AmbientSoundSimple Actor
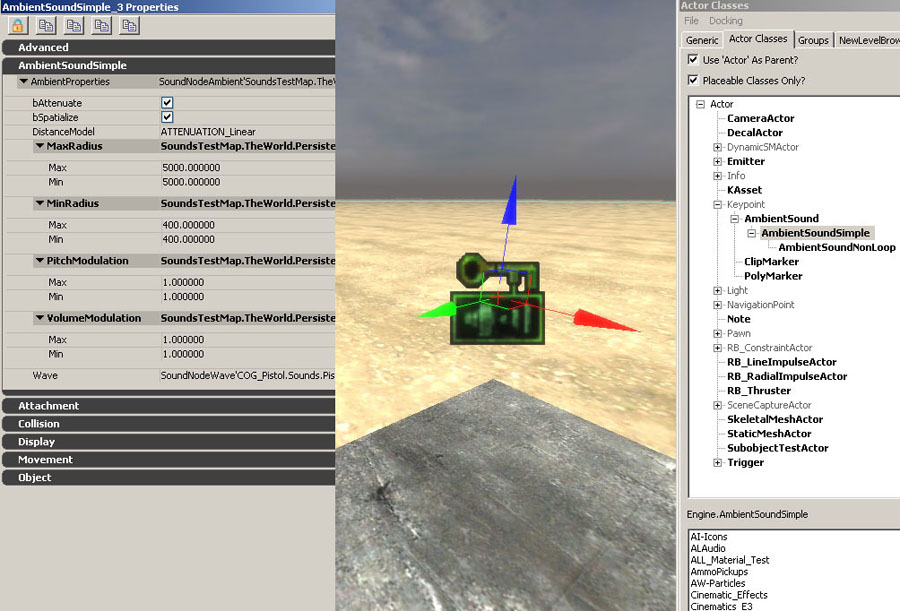 This allows per Actor control over Attenuation, Spatialization, Radii, and Modulation. Relative Volume and Pitch adjustments are accomplished by using Volume Modulation and Pitch Modulation. The Min\Max Radii can be seen in the editor graphically as spheres and can be adjusted in real-time by click dragging the Red\Green\Blue Actor arrows.
AmbientSoundNonLoop Actor
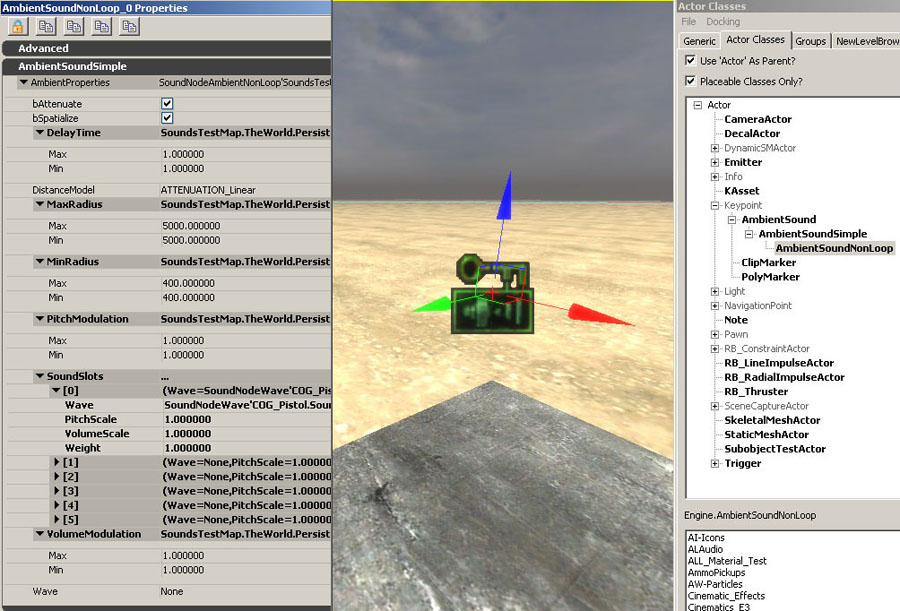
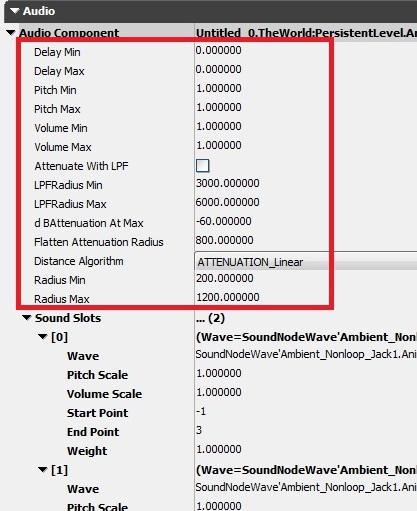
- Delay Time controls the Minimum and Maximum amount of silence between triggers in seconds. Each time an audio file is triggered it'll randomly pick a delay time between that range.
- Volume Modulation + Pitch Modulation are used to define overall Actor Volume + Pitch
- Sound Slots are added for each Wav file by clicking the small green icon located on the right side of the SoundSlots tab. Each Sound Slot features per slot volume, pitch, and weight properties. Weight controls the probability a Sound Slot will be triggered relative to other Sound Slots in the Actor.
- The `Wave' slot located at the bottom of the Actors window should be ignored and not used.
- The Min\Max Radii can be seen in the editor graphically as spheres and can be adjusted in real-time by click dragging the Red\Green\Blue Actor arrows.
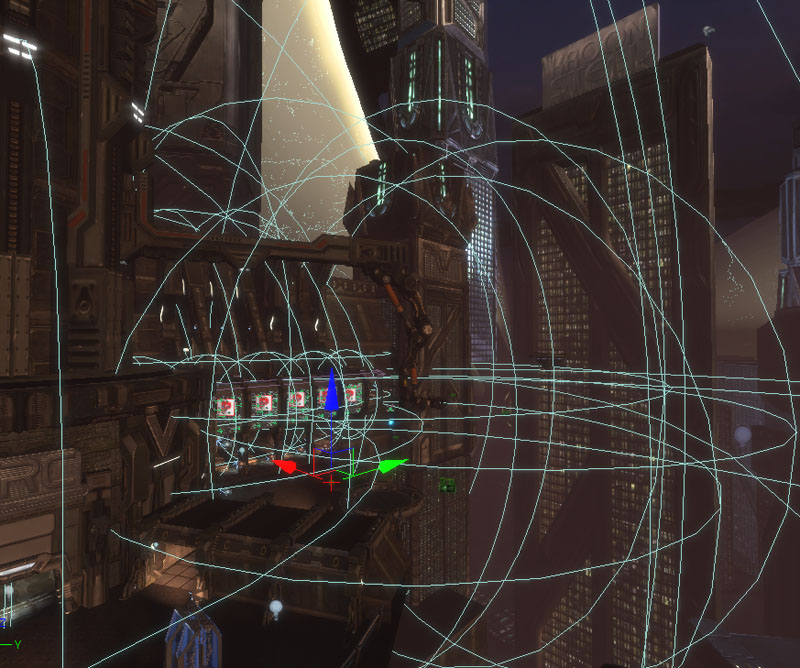 All AmbientSoundSimple + AmbientSoundNonLoop Actors selected in a map.
AmbientSoundSpline Actor
- Open Content Browser, select Actor Classes tab, expand Keypoint -> AmbientSoundSpline
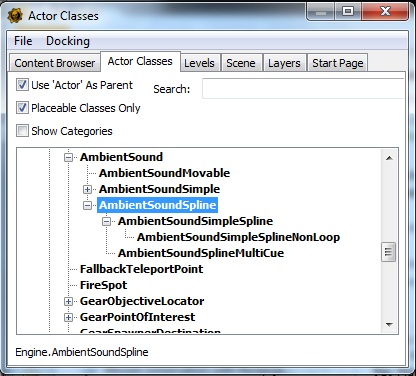
- Pick the one you want (Simple, NonLoop or MultiCue)and drag it onto game's world
- Draw the curve on which sound will travel. Best possible way is to select the TOP view in view-port. Then press and hold left mouse button on white square in the center of actor icon. While keeping left mouse button pressed you will have to press PERIOD and move your mouse to add a new point. Then you will see that a new point has been created.
- If you wish to delete extra points on your spline you need to use BACKSPACE. it can be only done by starting from the last one towards the first one.
- If you wish to change the shape of your spline just grab one of the white squares and move it into appropriate position
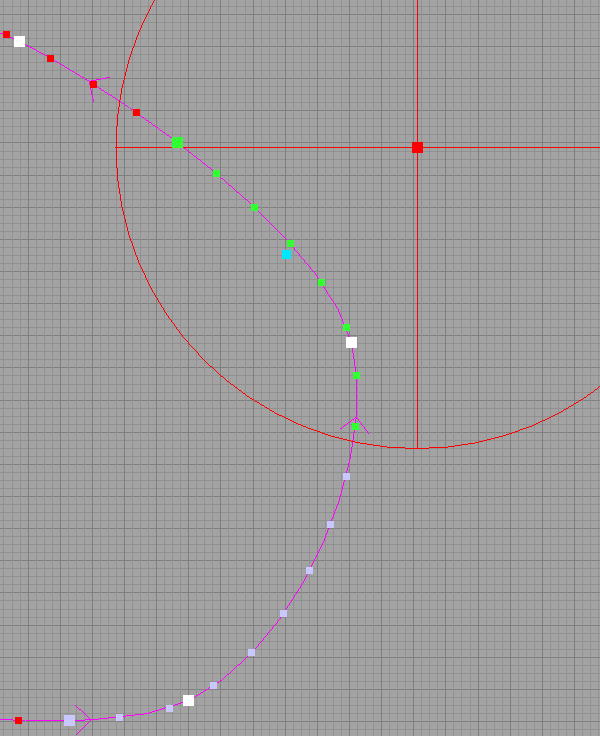 Points on spline:
 - Blue point shows the virtual speaker's position.
- White - spline curve control points.
- Light violet - points with a sound range defined.
- Green - points inside the listener's scope.
- Red circle represents listener's hearing scope. Red point represents listener's position (draggable).
- AmbientSoundSplineSimple - holds properties of regular AmbientSoundSimple
- AmbientSoundSimpleSplineNonLoop holds properties of regular AmbientSoundNonLoop
- AmbientSoundSplineMultiCue - holds properties of regular AmbientSound
 Below you will find description of properties which can be found in each type of spline actor
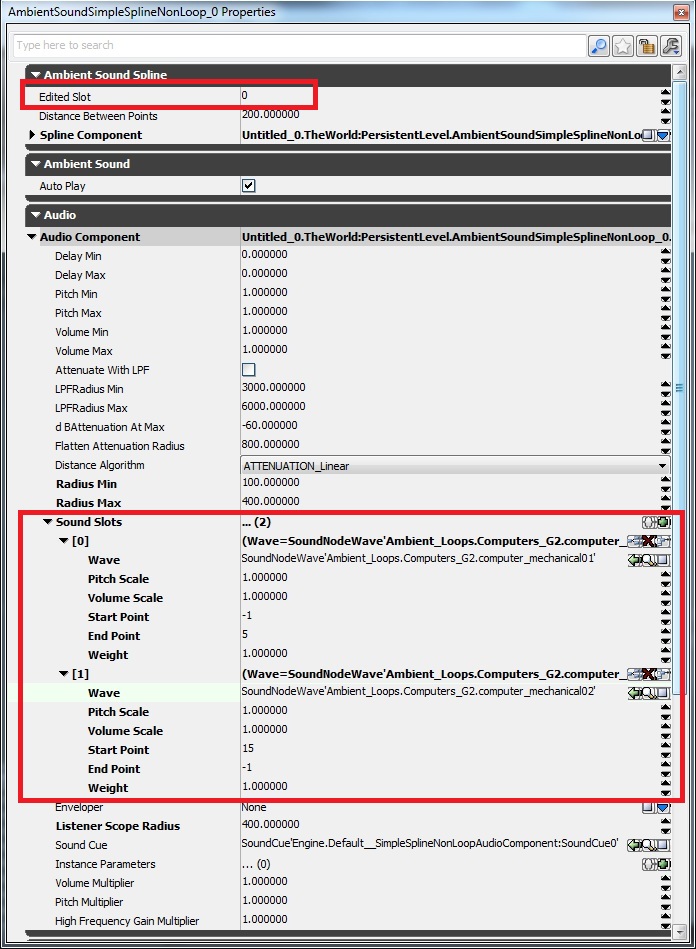
- Edited Slot - shows currently edited Sound Slot on the spline
- Spline Component - you can change curvature type by expanding Ambient Sound Spline -> Spline Component -> Spline Info -> Points
- Sound Slots -> Start Point - place on spline where sound starts to track the camera. -1 = 1st point on the spline
- Sound Slots -> End Point - place on the spline where sound finishes to track the camera. -1 = last point on the spline
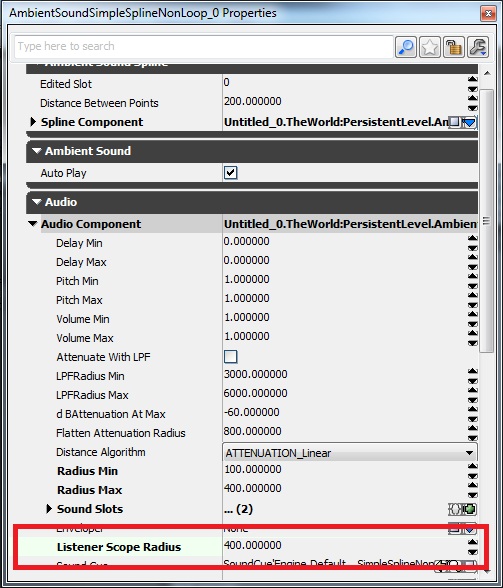
 Listener Scope Radius - shows the radius in which you will be able to hear sounds on the spline. Cannot be smaller than RadiusMax. It is presented visually as well. Usually when you create a Spline Sound Actor you will see a big red circle, with red square dot in the middle, somewhere in the area. This one represent the hearing range of the camera and you can move it using your mouse. There is also a blue dot representing virtual sound source which is audible to camera. This is the place where actual sound comes from. Green dots moving on currently edited slot when you approach red circle close enough represent camera's hearing range.
ReverbVolume
SoundTriggeringVolume
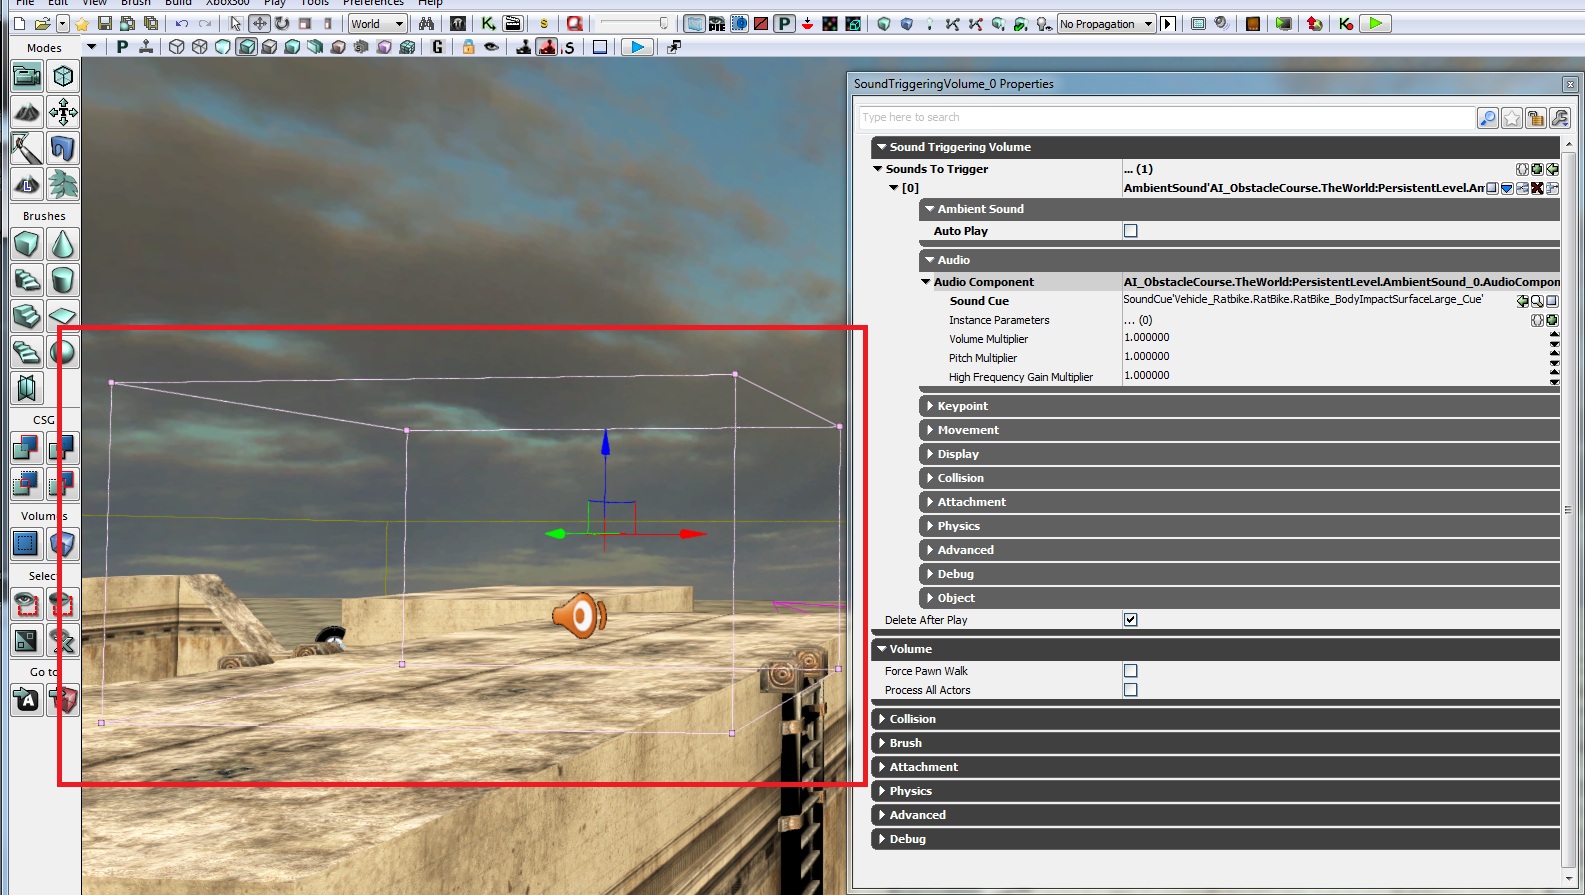
- Create a volume using brush builder. When done please pick SoundTriggeringVolume by right mouse click from volumes selector
- When done press F4 (properties) and click on the padlock symbol while you keep SoundTriggeringVolume selected
- Mark (in viewport, or scene manager) actor/actors you want to be triggered and then press "use selected object in content browser" (green arrow symbol)
- This will add scene actors to the SoundTriggeringVolume
- Once you enter it every SoundActor hooked will be played.
- After being played this SoundActor will be moved to garbage collector (unless it is a looped sound). If, for some reason, you need to leave this actor in memory please uncheck ‘Delete After Play’ flag in actor’s properites
Sound Actors Properties
Enveloper
- insert chosen SoundActor in game world
- open its properties
- select 'create new object' in Enveloper slot
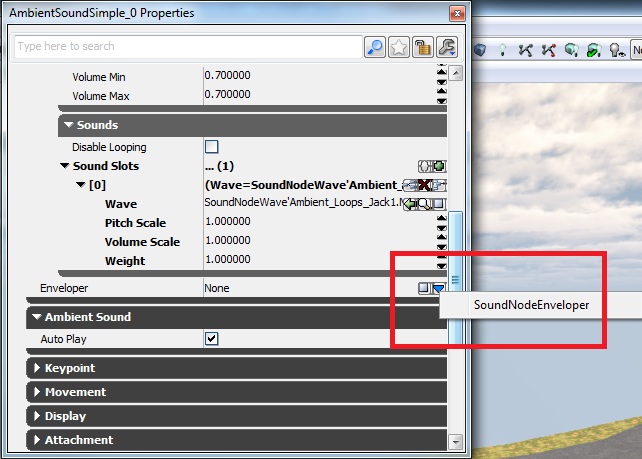
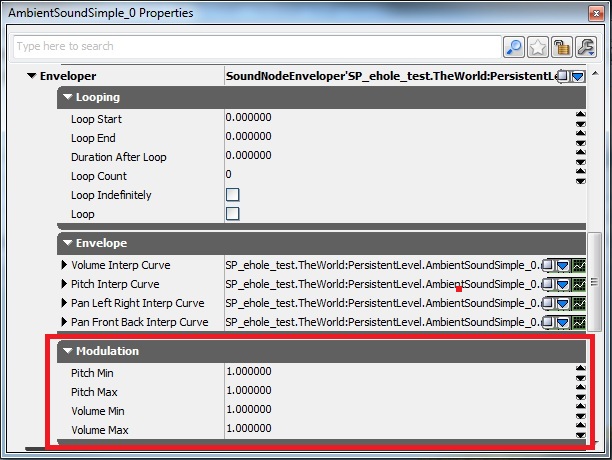
- it will create an Enveloper module with 3 properties: Looping, Envelope, Modulation
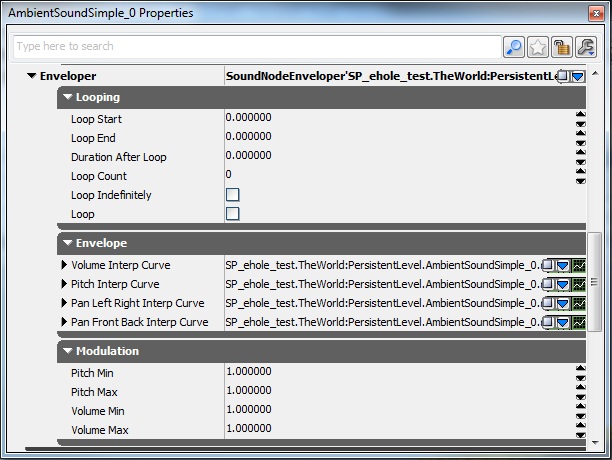 Enveloper properties:
Looping:
Enveloper properties:
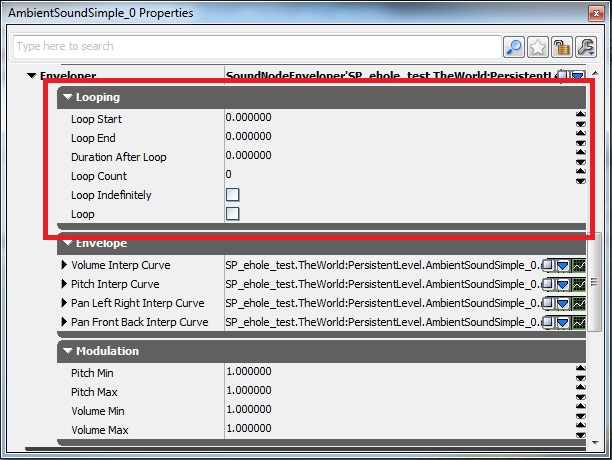
Looping:
- Loop Start - envelope's start point of loop
- Loop End - envelope's end point of loop
- Duration After Loop - fade out time after which looping is finished
- Loop Count - quantity of loops
- Loop Indefinately - switch yes/no
- Loop - switch yes/no (designed to work with Loop Count switch)
 Envelope. Click on right side green chart symbol to bring graphical interface:
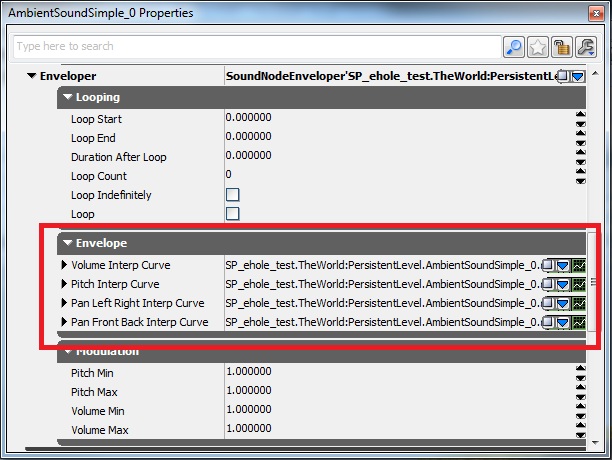
- Volume Interp Curve - volume envelope which you can define. expand structure until you see 'Points'. Where: InVal = time in seconds, OutVal = volume multiplier, InterpMode = type of curve
- PitchInterpCurve - pitch envelope which you can define. expand structure until you see 'Points'. Where: InVal_= time in seconds, _OutVal = pitch multiplier, InterpMode = type of curve
- PanLeftRightInterCurve - panning envelope which you can define. expand structure until you see 'Points'. Where: InVal_= time in seconds, _OutVal = panning multiplier (1 = 100% left, 0 = center, -1 = 100% right. works only with mono sounds, needs Spatliaze flag on actor to be switch off), InterpMode = type of curve
- PanFrontBackInterCurve - panning envelope which you can define. expand structure until you see 'Points'. Where: InVal_= time in seconds, _OutVal = panning multiplier (1 = 100% front, 0 = center, -1 = 100% back. works only with mono sounds, requires 'Spatialize' flag on actor to be switch off), InterpMode = type of curve
 Modulation. Randomizes predefined values across all defined points on envelope:
- PitchMin - minimal value of played pitch
- PitchMax - maximal value of played pitch
- VolumeMin - minimal value of played volume
- VolumeMax - maximal value of played volume
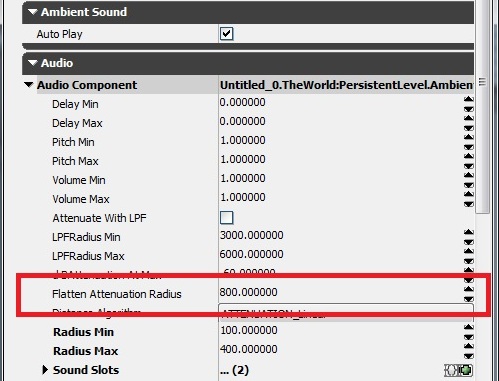
OmniRadius (Flatten Attenuation Radius)
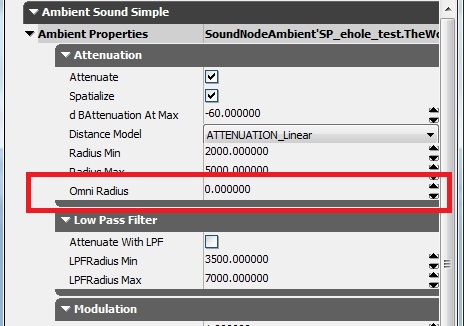 When used in conjunction with AmbientSoundSpline actor this is called Flatten Attenuation Radius